Chapter 1· Groove OS 1.4
Getting started
Play along as you read: Play it live opens a working FM-1, running its real software, on the screen this part of the page is about. Tap a control's name in the text to find it on the panel.
Groove OS turns your M-VAVE FM-1 into a groovebox: up to eight tracks of FM, virtual-analog and drum sounds, a step sequencer, an arpeggiator, chords, scenes and a performance screen, all running on the FM-1 itself. This chapter gets it installed, makes your first sound and builds your first loop. This manual describes Groove OS 1.4. New to grooveboxes? Learn on your FM-1 teaches you on the FM-1 itself, a step at a time.
What you need
| Item | Notes |
|---|---|
| An M-VAVE FM-1 | Running M-VAVE's own V15 firmware (or an earlier Groove OS). Groove OS installs over V15: on an older M-VAVE firmware or another custom firmware, the page puts V15 on first. |
| A USB data cable | Some cables only charge. If the browser cannot see the FM-1, try another cable. |
| A computer with Chrome or Edge | Mac, Windows, Linux or ChromeOS. The install talks to the FM-1 over USB MIDI, which Safari and iOS do not offer. |
| Your Groove OS account | The install page opens for owners. Sign in first. |
No computer is needed to play. You need one to install, to update, to load sound banks and to back up projects.
Install it from the browser
- Open the Install page of the website in Chrome or Edge and sign in.
- Connect the FM-1 with the USB cable, switch it on and close other MIDI programs (a DAW, an editor).
- Press connect FM-1. The browser asks for MIDI access with SysEx: allow it. Connecting sends only the identity question.
- The page shows what the FM-1 runs and which build it will install. Tick the list under before you start (a data cable straight in, a laptop on power, the tab kept open, other MIDI programs closed, and that you understand Groove OS is independent software), then press install.
- Leave the cable and the tab alone. The install takes about three minutes: two steps with a restart between them, then a short last step that adds the rest of Groove OS and restarts once more. The FM-1's screen goes dark while it writes.
- When the page says installed, the FM-1 restarts into Groove OS. If the screen stays dark, switch the FM-1 off and on.
- The page then shows what to do next. First, one line:
Six courses are on your FM-1: SETTINGS > LEARN.Tap (SETTINGS), thenLEARN, and the FM-1 teaches you the rest (see Learn on your FM-1); See the courses shows them on the website first. If the line says the courses were not added this time, the FM-1 works as it should: install again to add them. Start with CORE (See sound packs) opens the sound packs on the Sounds page: play the eleven sound packs there, CORE for a start and ten genres, then add the ones you want into banks A to D. See Loading banks from the website.
Every part is checked as it is written, and the page checks the download against a published checksum before it sends anything. The FM-1's own presets (banks A to D) are not touched. Installing over an earlier Groove OS may move where projects are kept: the page tells you before it writes and offers to export them all first. See Install, update and the way back for the details, for updating, and for what to do if an install is interrupted.
Careful: the way back to M-VAVE's V15 is the same page, with M-VAVE's own file. There is no backup of the old firmware on the FM-1, and V15 uses the flash where Groove OS keeps its projects, so going back erases your saved Groove projects. Export them first. See the way back.
First power-on
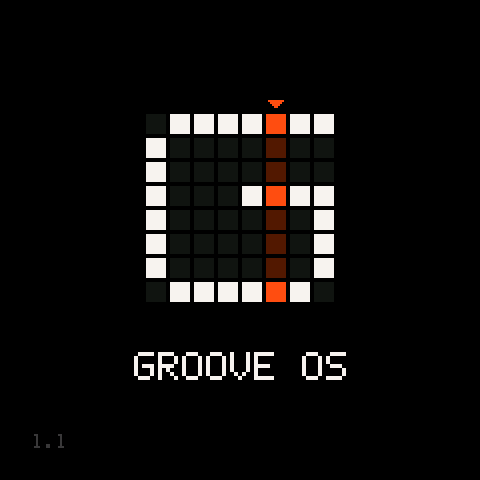
Switch the FM-1 on. The Groove OS logo plays for a couple of seconds, a column of squares sweeping across the letter G, and then you are on TRACKS.
A factory-fresh unit starts on EMPTY, a clean page with sounds ready: four tracks, a drum kit (DRUMS), a bass (FAT), keys (SOFT) and a lead (VIBES), no notes yet, 120 BPM with the click on. Play the keys and the selected track sounds; turn to pick another track. Nothing is wrong, nothing is locked: every part can be changed.
Songs to start from come with every sound pack on the Sounds page. CORE, the first pack, has songs in different styles: on its page, /sounds/core, Add song to FM-1 puts one into an empty slot. When the music is stopped and nothing is unsaved, the FM-1 opens it right away; otherwise load it from PROJECT (the slot, LOAD). See Songs inside the sound packs.
From then on, power-on picks up where you left off. The session is saved automatically while the music is stopped (every two minutes, once you have left the controls alone for a moment, and when you leave the PROJECT view), so the next power-on, or the restart after a power cut, brings it back. SETTINGS > STARTUP can be switched to NEW if you would rather start from a blank session (Settings).
First five minutes
Pro tip: to be walked through your first groove step by step, on the FM-1 itself, start First Groove: tap (SETTINGS), then
LEARN, pickFIRST GROOVEandSTART. It starts from silence and checks each step as you play it. See Learn on your FM-1. Pro tip: in the browser, Learn's first chapter builds a beat with you from the same clean page, each control to press lit on an FM-1 on the screen, on the real Groove OS.
To make a beat of your own, these are the things to know first. (To look around a finished song first, load a song from a sound pack and try your first ten minutes, then come back.)
-
Start fresh. A new FM-1 is on EMPTY already. Later, to start again: turn to PROJECT, turn down to
NEWand press , then put the cursor onEMPTYand press . EMPTY is a clean page: four sounds, no notes, two bars long, with the click on. If the session has unsaved changes, or the music is playing, it asks first (EMPTY? UNSAVED CHANGES ARE LOST). CANCEL is chosen first, so turn toSTARTand press . If you would rather play along with something, add a song from a sound pack (CORE's are a good start) and load it instead. To clear one track and keep the rest, put the cursor on its lane on TRACKS and hold (SHIFT is held down): it asks, and undo brings the track back. See A clean page. -
Write a beat. Tap for TRACKS, turn to the DRUMS lane and press : the step grid, the drums down the side and the 16 steps of a bar across. The black keys pick the drum (pads 1 to 8). The 16 white keys are the 16 steps: the first white key is step 1, the second step 2, the last step 16. Tap a key to place the selected drum's hit on that step, and tap it again to remove it. You don't need to move the cursor to write: a tap always writes on its own step, wherever the cursor is, and takes the cursor there. Or work the other way round: walk the cursor to a step with , hold and press black keys, and each drum's hit lands on that step. The cursor is for editing a hit you have placed: walk to it with and press for its velocity, chance, ratchet, flam and nudge. Hold a step's key and turn to to give that one hit its own tune, decay, level and velocity. See The step grid and Parameter locks.
Careful: a white key is a step, not "write at the cursor". If you put a hit on step 1, move the cursor to step 2 and press the first white key again, you have pressed step 1 again, and the hit goes. Press the second white key for step 2.
-
More bars. Hold (that is SHIFT) and press F3, G3, A3 or B3, the first four white keys: the track's loop becomes 1, 2, 4 or 8 bars, and what you wrote repeats into the new bars, so you only change what should differ. If you did not want the copies, a tap of takes them and the length back. On the drum grid, and OCT+ go to the previous or next bar, and the white keys are then the steps of that bar; also walks on into the next bar past step 16. A one-bar track has no next bar, so lengthen it first. In the melodic sequencer the bar is or SHIFT + OCT+ (there OCT alone is the octave, and SHIFT with F3, G3 or A3 sets the pattern to 1, 2 or 4 bars). See Length and loops and SEQ.
-
Get more sounds. The Sounds page has 11 sound packs, free: CORE, a good first one that fits any style, plus 10 genres from LO-FI to AFRO. Each is a drum kit and 24 sounds, FM and VA. Play them in the browser, then load one into any of the FM-1's banks A to D (see Loading banks from the website). Each sound pack also has two or three songs inside you can put into a slot and take apart.
Try it·On the FM-1
Turn SELECT one click: MIX, the second view. Turn it back for TRACKS.
SELECTYour first ten minutes
Try these in order, on a song from a sound pack (CORE's are a good start): press Add song to FM-1 on the pack's page, for example /sounds/core. If the FM-1 does not open it right away, turn to PROJECT, put the cursor on that slot, press and pick LOAD. Each is one idea, and none can lose work without asking you first.
- Hear it. Press . Watch the playhead cross the lanes on TRACKS.
- Pick a track. Turn (the right-hand encoder). The white frame moves from lane to lane and the selected track's name appears in a toast. Under the screen, to are that track's four macros, each named for the sound (a bass might read
TONE WIDTH GROWL PUNCH). Turn them while it plays. - Change the sound. Turn the encoder. The browser opens, and each detent plays the next sound on a spare voice; the track keeps its own sound until you press to take one. leaves with nothing changed. See SOUND.
- Play the keys. The 27 keys play the selected track. With IN KEY on, a key outside the project's scale slides to the nearest note that fits. See KEYS.
- Roll a new idea. Hold (that is SHIFT) and press : DICE writes a new line for the selected track, in key, with the same rhythm feel. On a drum track it writes a new beat. If you do not like it, hold and tap : undo. See SEQ.
- Drop a part out. Turn (the left-hand encoder) to the right: MIX, then PERFORM, the third view. On PERFORM the white keys 1 to 8 mute and unmute the tracks. See PERFORM.
- Record yourself. Turn back to TRACKS, select a track and press . A one-bar count-in, then play: your notes and your knob moves are written onto the track's loop. See Recording and undo.
- Keep it. Press . The project goes into a slot on the FM-1. See PROJECT.
Pro tip: the bottom line of most views is a hint that says the next useful move (
PLAY: HEAR IT · SEL: TRACK MENU). It is on by default; SETTINGS > HINTS switches it off.
Pro tip: the Learn pages build one whole beat with you, step by step, in the browser on the real Groove OS.
Where things are
| You want to | Go to |
|---|---|
| Learn step by step, on the FM-1 itself | Learn on your FM-1 |
| Learn the controls and how every screen works | The controls |
| See, add, shorten and rename tracks, set the tempo | TRACKS |
| Pick or edit a sound | SOUND |
| Program drums | KIT |
| Play your own drum sounds | Your own sounds |
| Write a pattern note by note | SEQ |
| Stay in key, play chords | KEYS |
| Arpeggiate a held chord | ARP |
| Balance tracks, add reverb and delay | MIX and FX |
| Play it live | PERFORM |
| Back up, share, start a new song | PROJECT |
| Connect a keyboard, a DAW or a drum machine | MIDI and sync |
| Fix a problem | Troubleshooting |
Troubleshooting
| What happens | Why, and what to do |
|---|---|
| The browser cannot find the FM-1 | Use a data cable, plug straight into the computer (no hub), switch the FM-1 on and close any DAW or MIDI editor. If the browser lists no MIDI devices at all, quit it completely and open it again. |
| The install page says the build is not published yet | You can still connect to see what the FM-1 runs. The install button turns on when a build is published. |
| The screen stays dark after the install | Switch the FM-1 off and on. If it still does not come up, see If the screen stays dark. |
The stock screens appear after a grey G and SAFE MODE, and the logo does not play | Safe mode: and OCT+ were held at power-on. Switch off and on again without touching the keys. See Safe mode. |